Column Database Operations
This topic is only applicable to FieldtypeDynamicSelects, i.e. backend use.
As previously stated, the database table columns needed to hold data for Dynamic Selects fields are dynamically created when the field is being set up. The following operations are possible.
Adding Columns
To add columns to the Dynamic Selects field, click on the link add column in the columns settings HTML table. This will add a row in the HTML table corresponding to a single dropdown in a Dynmamic Selects field. On save, this action will create a column in the field's database table for each defined column.
Renaming Columns
You can rename your columns at any time (i.e. their names and/or their labels). If renaming the column name, this will also rename the corresponding columns in the field's table in the database. Please note that renaming a column will mean changing all instances of the column name in your template files if applicable. This is because the field's (PHP Class) properties are named after their respective columns.
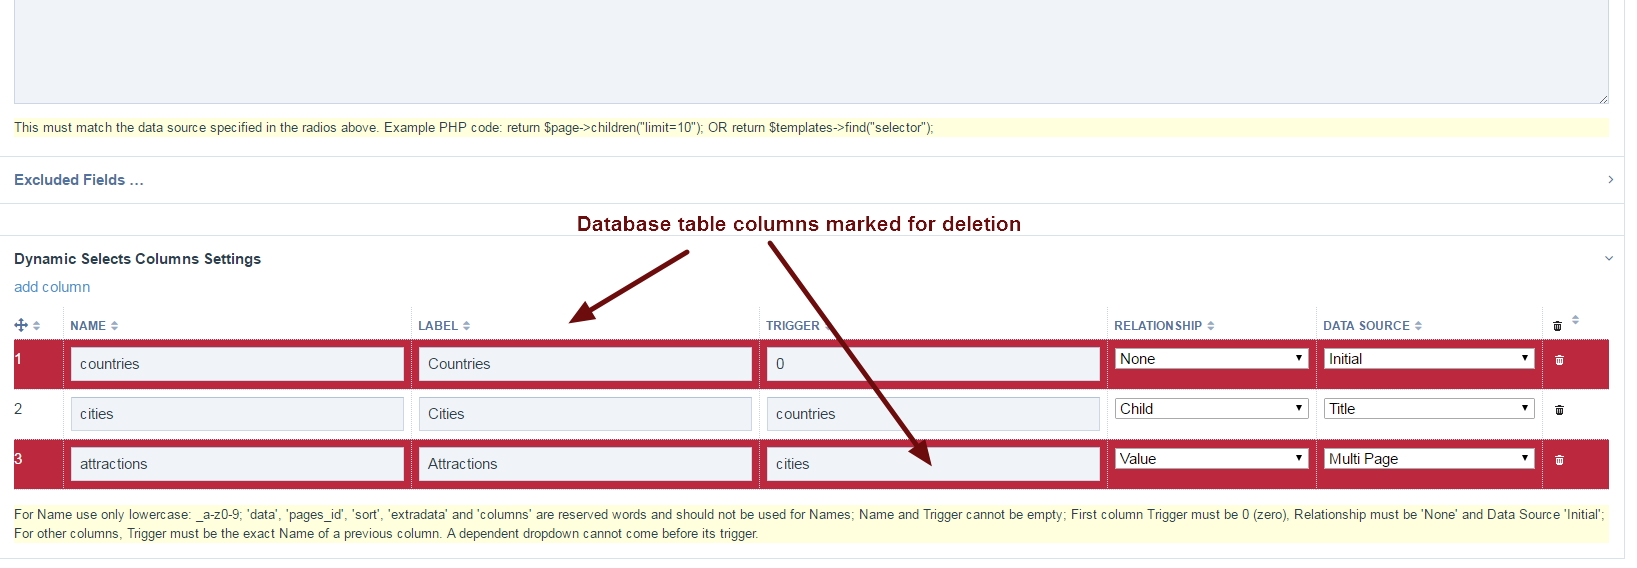
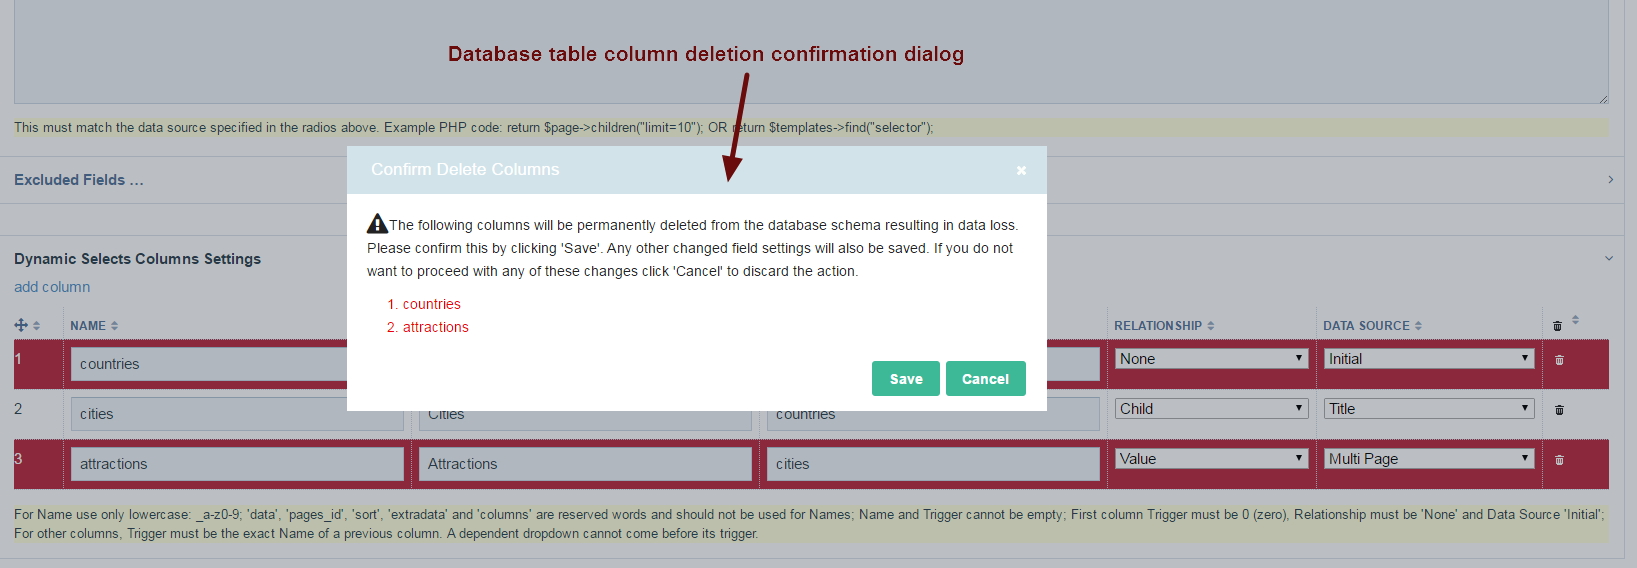
Deleting Columns
To mark a dropdown and hence a database table column of the field for deletion, click on the trash can for its row in the columns settings HTML table. If you wish to delete all columns, click on the trash can in the header row instead. Please note that clicking a second time on a trash can deselects previous selections. Marked table rows (i.e. columns) will be highlighted in red. If you then click on the Save button, a confirmation dialog will pop-up asking you to confirm whether you wish to proceed with the deletion. Proceed with caution! This is because deleting columns will lead to loss of the data that was saved in those columns for pages using the field since it modifies the database schema for the field. If you wish to cancel, click on the Cancel button in the pop-up dialog. All marked table rows will be deselected and the pop-up will close. If, however, you are sure that you want to delete the columns, click instead on the Save button in the pop-up. The pop-up will close and the marked database table columns will be deleted. Please note the database table itself (i.e. the field) is not deleted.
Please note that all of the above operations can be carried out simultaneously.